What a pleasure it is in winter to please yourself and your family with fresh vegetables and fruits not from the freezer or store, but from your own site. Of course, for this you need to work hard and build a good heated greenhouse with watering. Polycarbonate is one of the modern materials that has proven itself perfectly.
Characteristic of a winter greenhouse
The winter greenhouse, of course, differs from the summer version of the film and here are its main characteristics:
- the concrete foundation is necessarily poured and waterproofing is done;
- the frame should be steel or solid wood;
- it is necessary to equip it with artificial lighting and heating;
- the presence of ventilation;
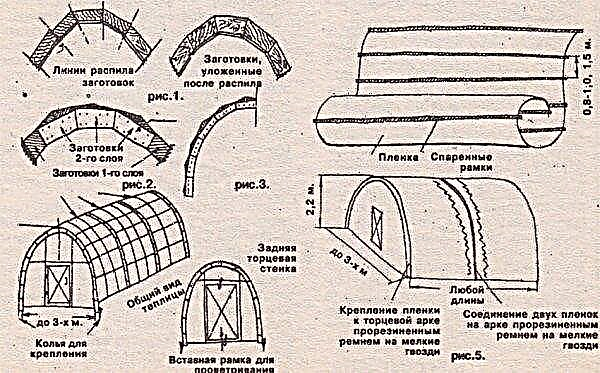
- the roof should be in the form of an arch so that no sticking occurs during snowfalls;
- polycarbonate thickness of at least 1.6 cm.
Did you know? The largest greenhouse in the world occupies 1.56 ha and located in the UK. Building height 55 m, width 100 m, length 200 m.
Winter Greenhouse Requirements
The main thing during the construction of a structure for winter cultivation is to make it warm, because in winter the energy of the sun is not enough to create a comfortable climate inside. With the relatively small size of the building, with an area of up to 250 m², you can perform insulation work with your own hands.
Heating and insulation
The choice of heating systems is wide enough and here already everyone is guided by their wallet and capabilities.

The most popular methods of heating include:
- water using solid fuel, gas or electric boilers;
- stove using a "potbelly stove";
- gas guns - A fairly budget option, since there is little gas consumption, and the greenhouse heats up quickly. Also, such guns are safe and compact;
- use of infrared heaters or convectors. The second option is less popular, because it dries the air too much and has low heat transfer. Infrared heaters warm the greenhouse evenly, without drying it;
- warm floor, those. soil heating with a special cable or pipes - it is good to use in combination with other types of heating, for example, water.
Did you know? Polycarbonate is several hundred times stronger than glass - it is not afraid of a hammer and bullets.
Whatever heating you install, it will not be effective if you do not take care of the insulation. After all, the lower the air temperature in the street, the higher the heat loss.
In order to reduce them, they resort to such tricks:
- seal all joints and cracks to the maximum;
- lower the greenhouse as low as possible into the ground;
- make at least one dull insulated wall;
- use polycarbonate of higher density - up to 25 mm.
Watering and humidity
You need to take care of the source of water at the stage of supervision of the place for construction. If the source of water is far, then you will need to beat a well nearby. In winter, the water should be heated, so tanks with heating elements will be needed.

For water, tanks up to 1 m³ are suitable. When heated, the water gives off heat in stages, so such tanks will be an additional source of heat. Tanks are best located on the north side and slightly above the ground. Ordinary spray guns can be used to maintain moisture. As a rule, the humidity in a greenhouse is kept at the right level.
Ventilation
Excess moisture and heat for plants can be fatal, so the excess must evaporate. Also, plants need a full air exchange, which means ventilation. For this purpose, special vents are mounted in the greenhouse, placing them at the top of the wall or on the roof.
Lighting
As auxiliary lighting in winter, discharge lamps are excellent. Their number is calculated on the basis of the norm - 100 watts of power per 1 square meter.
How to build a winter greenhouse with your own hands with heating?
Any construction starts with a drawing, choosing a place, calculating how much it will cost and purchasing materials, because even the best projects need competent planning.
Foundation for the greenhouse
The first thing, as when building a house, is laying the foundation. The choice of materials for him is quite large. It can be a brick, timber, stone. Also make strip foundations. The brick method is the most expensive, but the foundation will last a very long time.

The first step is to dig a rectangular recess in which reinforced material is laid and all this is poured with concrete. Concrete is left to dry for 4 days. When the base is frozen, the base is laid out with a brick. After each layer of brick is waterproofing. Lastly, a beam is attached, which will be the basis for the frame.
If the construction is planned to be temporary, then a quite budget option is to build a timber foundation. Previously, the tree is impregnated with an antiseptic. Along the entire perimeter of the recess, metal corners are driven into the ground, to which wooden supports are attached and hammered into the ground. Along the perimeter of the base of the greenhouse, pre-prepared 10 × 10 wooden blocks are laid.
Important! Clay is washed with water, so the foundation is plastered.
An ideal option for a polycarbonate greenhouse is a stone foundation, as it can withstand any weight. With such a foundation, a winter house for plants will be capital, but the construction technology is relatively complex. It may turn out that it will be difficult for an amateur in a construction site to put a greenhouse of such a plan. As a solution, a mixture of clay and sand is used 1: 1.
Foam concrete walls
Such blocks are very popular now. They are durable, lightweight and have high thermal insulation, so they fit the walls of the greenhouse as well as possible. On the two layers of roofing material lay the first row of blocks using cement-sand mortar. Foam blocks are placed on a solution with a seam of 1 cm, fitting them with a rubber hammer and checking the level of horizontal masonry.

After laying the first row, the next two are placed on a thin layer of special glue, and the gaps are smeared with excess glue. The masonry is reinforced after 3-4 rows, while using a special masonry mesh or empty blocks inside with reinforcement. A vestibule is being completed from the north using the same construction technology. There you can place a utility room, a water tank or simply equip an entrance.
Having completed laying along the walls, you need to lay the strapping beam and fix it with fixing anchors, cemented into the blocks of the upper row in advance. Further, it is all aligned on the outer edge. Outside, impregnation is made with bitumen or polymer for waterproofing and sutured with foam up to a thickness of 10 cm. The foam is “seated” on an adhesive, preferably cement or polymer.
After the glue has dried, backfill the soil. The next stage is the installation of rafters from a 5 × 7 or 5 × 10 cm beam. The rafters are fastened by cutting into strapping or ridge boards, in which holes for polycarbonate sheets are cut out in advance. Grooves are also made in the rafters, where then lattices from wooden battens are laid. They are placed at the level of the rafters. At the end of the work, the tree is impregnated with an antiseptic.
Greenhouse cover
On the finished slopes put the 1st layer of polycarbonate in thickness up to 6 mm. Condensate will flow through the internal channels, and therefore their direction must be observed. At the top, the joints of the sheets are glued with tape, treated with sealant and driven into the grooves in the ridge beam.
The bottom ends are glued with a waterproof sealant. It is also possible agrofibre. Sheets are fixed in pre-prepared holes through 16 mm thick wooden slats and a second layer of polycarbonate is placed on top, leaving a gap of 1.6 cm to maintain heat.

The second layer of polycarbonate is mounted on the guide rails, while the upper ends of the sheets are glued with tape and inserted into the grooves in the ridge beam on silicone sealant. The protruding ends of the spros and battens align with the polycarbonate sheets.
The ends, the edges of the sheets and the air gap between them are closed using a galvanized profile, which is fixed with screws to the ends of the rails. To completely seal the roof, the ridge beam is also finished with a galvanized profile, anointing all joints with silicone sealant. If there is a vestibule, then a horizontal roof is laid over it and equipped with an opening hatch.
Arrangement of the greenhouse
Down the vestibule they put a ladder. The material used is wood or concrete. The heating furnace is located inside the greenhouse, closer to the vestibule, on a solid foundation - bricks, concrete slab or paving slabs. The chimney is led out through the wall.

In the case of using an air heating system, plastic pipes are laid along the perimeter of the beds and a fan heater is connected to them. After the end of the greenhouse, you can start marking the beds and installing shelving for the greenhouse. This construction option is able to keep the temperature above zero in frosts down to -10 ° C even without heating.
If the temperature is below -10 ° C, it is enough to heat the furnace once a day - early in the morning. In the daytime, heat will be maintained by sunlight, and at night by heat coming from walls and soil.
Where is the best place to place such a greenhouse?
The place under the greenhouse fits well-lit and protected from drafts. It is good if there is an opportunity to attach it to the wall of the house, garage, barn and always from the sunny side. If the building is freestanding, then they place it from north to south, while the northern wall is correctly made deaf or like a vestibule.
Important! You should not build a greenhouse near the trees, as they will give shade in the summer.
Of course, the construction of a capital winter greenhouse at home is troublesome and costly, but the result will certainly compensate for all costs.

